Welcome to my kitchen, where I invite you to explore a classic Southern dish that warms the heart and comforts the soul: Simple 5-Ingredient Southern Depression-Era Milk Gravy. This dish may seem simple, but its roots run deep in the South, a place where every ingredient tells a story, and every recipe is a cherished family secret. Milk gravy has been a staple on Southern tables for generations, a dish born from necessity that has transformed into a beloved favorite.
In the days of the Great Depression, when resources were scarce, families needed to make the most of what they had. This gravy, made with just five ingredients—flour, milk, butter, salt, and pepper—provides a filling, rich sauce that can be served over biscuits, fried chicken, or mashed potatoes. Let me guide you through making this delightful gravy, which not only evokes nostalgia but also brings smiles to faces around the dining table.
Why You’ll Love This Recipe
This simple yet flavorful milk gravy is incredibly versatile. It pairs beautifully with breakfast biscuits, drizzled over freshly fried chicken, or ladled generously over a pile of mashed potatoes. The options are endless, allowing you to customize your meal based on your tastes and the season. Additionally, it’s a great way to use up leftover meat drippings, adding depth and flavor to the gravy without any extra cost.
Nutritionally, this gravy is a comforting source of energy and can be part of a balanced meal when served with some greens or vegetables on the side. It’s also very easy to make, requiring little more than a few minutes of cooking time and basic kitchen skills. Perfect for newcomers to the kitchen or seasoned cooks looking for a quick addition to their meal plan, this gravy is both simple and satisfying.
Moreover, the flavor of milk gravy is warm and inviting. The creamy texture combined with the delicate seasoning of salt and pepper provides a memorable experience that speaks of home-cooked meals and family gatherings. Once you master this simple recipe, you’ll find yourself returning to it over and over again, making it a cherished addition to your repertoire.
Ingredients
- 1/4 cup all-purpose flour
- 1/4 cup unsalted butter
- 2 cups whole milk
- 1 teaspoon salt (or to taste)
- 1/2 teaspoon black pepper (or to taste)
Step-by-Step Instructions
- In a medium saucepan, melt the 1/4 cup of unsalted butter over medium heat, stirring constantly until fully melted, about **2 minutes**.
- Once the butter is melted, gradually whisk in the 1/4 cup of all-purpose flour, cooking the mixture for about **3-4 minutes** until it turns golden brown and has a lovely nutty aroma.
- Slowly add the 2 cups of whole milk to the flour and butter mixture, whisking continuously to prevent lumps from forming. This process should take about **2-3 minutes**.
- Continue to stir the gravy over medium heat for **5-7 minutes** until it thickens and begins to bubble, making sure to scrape the bottom of the pan as you whisk.
- Season your gravy with 1 teaspoon of salt and 1/2 teaspoon of black pepper. Adjust these measurements to your taste, then cook for an additional **1-2 minutes** to meld the flavors.
- Once the gravy reaches your desired consistency, remove it from the heat and serve hot over your chosen dish. Enjoy within **10 minutes** for the best flavor and texture.
Expert Tips for Success
To achieve the best results with your milk gravy, make sure to whisk continuously during the cooking process. This helps to avoid any lumps forming, ensuring a smooth and creamy texture. If you find that your gravy is too thick, you can easily adjust it by adding a little more milk until you reach your preferred consistency.
Using whole milk is crucial for optimal creaminess. However, if you want a lighter version, consider using 2% milk; just keep in mind this may alter the richness of the final dish. For an extra depth of flavor, you can incorporate drippings from cooked sausage or bacon into the butter before whisking in the flour, infusing your gravy with that classic savory taste.
Don’t be afraid to experiment with additional seasonings! While this recipe keeps it simple with salt and pepper, adding a pinch of garlic powder, onion powder, or even a dash of hot sauce can elevate your gravy to the next level. Remember to taste and adjust as you go to ensure your gravy has that perfect flavor balance.
If you happen to have leftovers, store them in an airtight container in the refrigerator for up to three days. Reheat your gravy over low heat, adding a splash of milk to help restore its creamy consistency.
Variations and Substitutions
- Herbed Milk Gravy: Add fresh herbs like thyme or sage for an aromatic touch that complements meat dishes beautifully.
- Sausage Gravy: Brown some breakfast sausage in the pan before adding the butter to create a hearty, flavorful variation perfect for biscuits.
- Spicy Milk Gravy: Stir in a few dashes of hot sauce during cooking for a spicy kick that will heat up your meal.
- Vegan Version: Substitute the butter with vegan margarine and use plant-based milk for a dairy-free gravy without sacrificing flavor.
- Cheesy Gravy: Stir in shredded cheese just after thickening for a rich and indulgent cheese gravy that’s delectable over fries or nachos.
Serving Suggestions
This Southern milk gravy shines when served over buttery biscuits as part of a hearty breakfast. Imagine fluffy biscuits, split open and generously ladled with warm gravy—it’s comfort food at its best. Additionally, consider pairing it with fried chicken for a meal that is pure Southern charm, turning any dinner into a special occasion.
Another fantastic option is over creamy mashed potatoes. The gravy adds richness and enhances the overall flavor of the dish, delighting both family and guests alike. For a truly Southern experience, consider serving this gravy alongside collard greens and cornbread, rounding out the meal with classic side dishes that have been enjoyed for generations.
FAQs
Q: Can I freeze milk gravy?
A: It is not recommended to freeze milk gravy as dairy products can separate and change texture when thawed. It’s best to store it in the refrigerator and consume within a few days.
Q: What can I use instead of butter?
A: You can replace butter with olive oil, coconut oil, or vegan butter to make a dairy-free version of this gravy.
Q: How can I make my gravy less bland?
A: Enhance the flavor with spices like garlic powder, onion powder, or herbs. You can also try stirring in some cooked bacon or sausage to add depth.
Q: Can I make this gluten-free?
A: Yes! Substitute regular flour with a gluten-free all-purpose blend to create a gluten-free version that retains the same delicious taste.
Final Thoughts
Simple 5-Ingredient Southern Depression-Era Milk Gravy is a beautiful reminder of the resilience of home cooking. Its simplicity and flavor encapsulate the essence of Southern hospitality. Whether you enjoy it with biscuits for breakfast or ladle it over fried chicken for dinner, this gravy is bound to become a beloved family recipe. Thank you for joining me on this culinary journey, and I hope you enjoy making this comforting dish as much as I do.
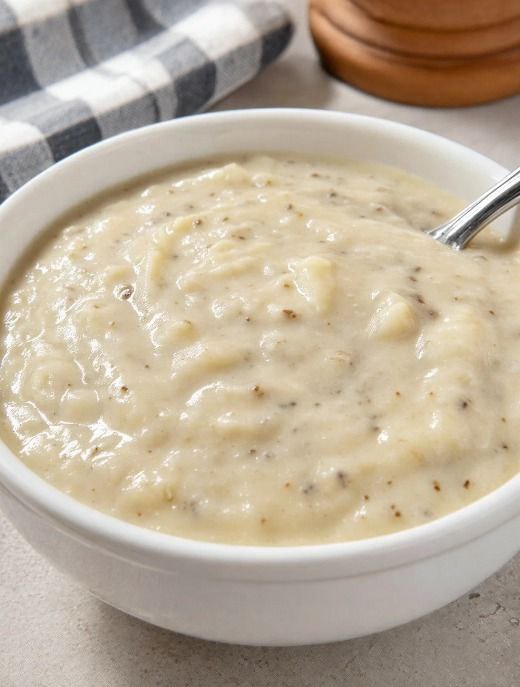
Simple 5-Ingredient Southern Depression-Era Milk Gravy
A rich and comforting gravy perfect for biscuits, chicken, or mashed potatoes.
Ingredients
- 1/4 cup all-purpose flour
- 1/4 cup unsalted butter
- 2 cups whole milk
- 1 teaspoon salt (or to taste)
- 1/2 teaspoon black pepper (or to taste)
Directions
- In a medium saucepan, melt the butter over medium heat, stirring constantly until fully melted, about 2 minutes.
- Gradually whisk in the flour, cooking for about 3-4 minutes until it turns golden brown.
- Slowly add the milk, whisking continuously to prevent lumps from forming, about 2-3 minutes.
- Stir the gravy over medium heat for 5-7 minutes until thickened and bubbling.
- Season with salt and pepper, adjust to taste, and cook for another 1-2 minutes.
- Remove from heat and serve hot over your chosen dish.